
 Now that it's October, our Halloween countdown can begin! I think, of all the holidays, Halloween just might be my favorite! We get to go crazy with creativity, dress up in ridiculous outfits, pretend we're people we wish we could be, go door to door collecting candy and we don't have to write thank yous!
 I'm not sure what I will dress the boys up as yet, but as I was looking through old photos, I found a quick, easy and inexpensive costume that I made for them when we attended the Friday, the 13th, baseball game/costume contest. I thought it would be so cute/clever to dress them up as "bat"boys! So the afternoon of the game, I whipped up two sets of batwings. I still can't get over how easy it was! If I ever dress them up as bats again, I will definitely go all out with black onesies and bat ears, but good thing I didn't on that day, because you can really see how great they turned out in this picture! If you're looking for a really easy costume, you should absolutely try this one out! I think it only cost me about $2 per wingset! That is super compared to the $70 costumes selling at Target right now! Here's how you make it...
How To Make Batwings
What You Will Need:
4 (8.5 x 11) sheets of sturdy black felt
4 (6 in) small wooden dowels
Stretch Elastic
Hot Glue
Black Thread and Needle
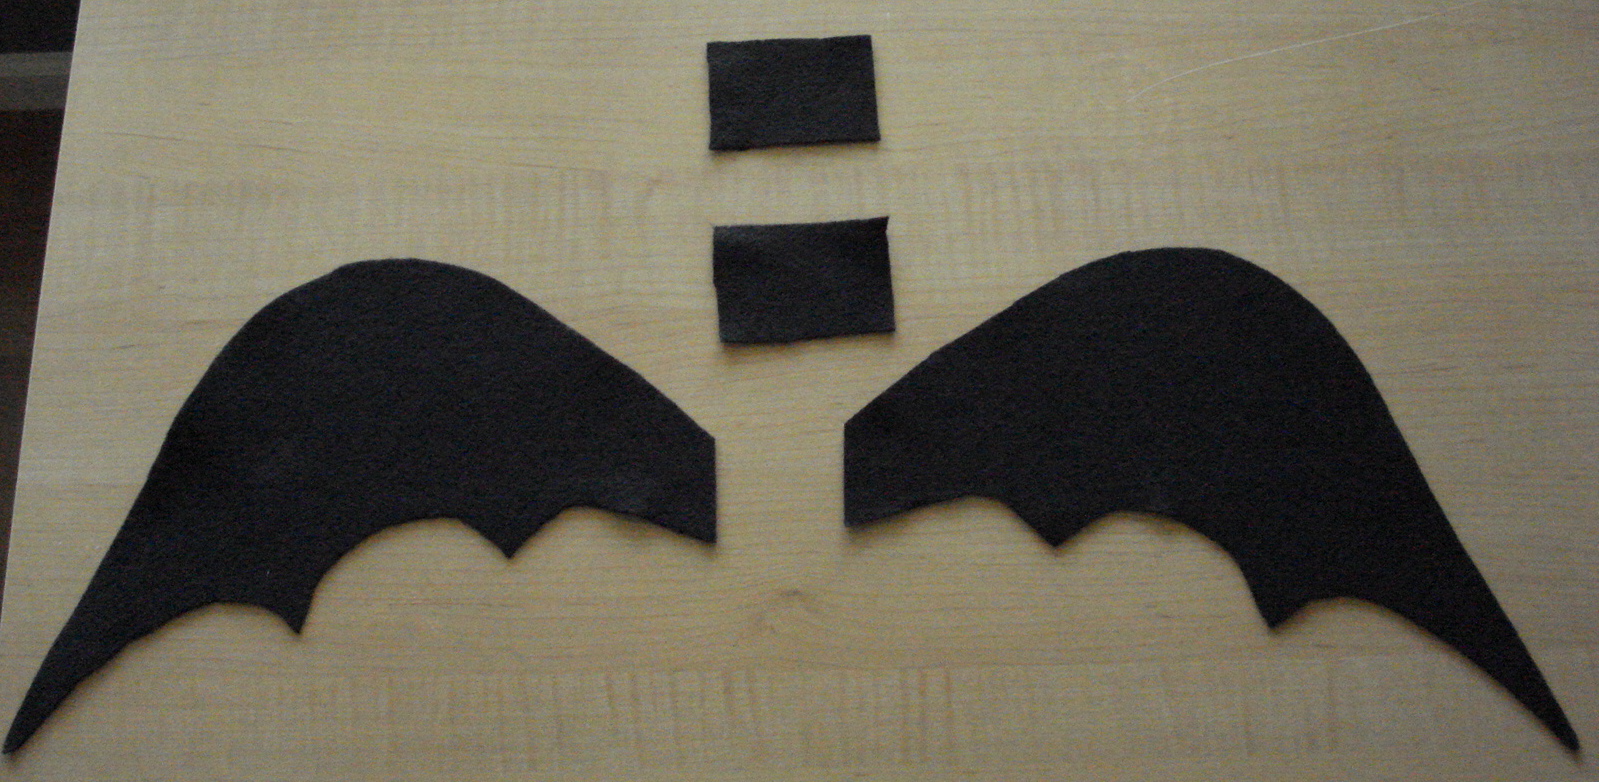
1. Trace the shape of your batwings onto the black felt and cut them out. You will need 4 wings to make a set, and you can get 1 wing per sheet of felt.
Do not disregard the scraps! Use the scrap pieces of black felt to cut out two small rectangles.
Do not disregard the scraps! Use the scrap pieces of black felt to cut out two small rectangles.
 2. Cut out two strings of elastic the length you will need to fit around the arms of whomever will be wearing the wings.
4. Place two wooden dowels so that they are sandwiched inbetween 1 wing with elastic sewn on and 1 wing with no elastic. With the edges lined up, hot glue the wings together. Repeat this process with the other set of wings and dowels.
5. Now that both the left and right wings are stable, press the center edges together so that the elastic circles meet. Pull the elastic bands out to the sides, and hot glue one felt rectangle on top of the edges of both wings so as to connect them. Flip the wingset over and hot glue the second felt rectangle to connect and cover where the two wings meet.
Happy Halloween!

This craft is featured at the following:
The CSI Project
Frou-Frugal
Hope Studios
Coastal Charm
The Girl Creative
Twee Poppets
Cheapskate4Life
I'm Just Sayin'
Fine Craft Guild
All Thingz Related
Today's Creative Blog
The Creative Itch
Sugar Bee Craft Edition
The Thrifty Home
Someday Crafts
The T-Shirt Diaries
We Are That Family
ABC and 123 Learning
What Allie's Making Now
Cute bat wings!
ReplyDeleteCute little kiddos in their bat wings!!
ReplyDeleteSUPER CUTE!! And the wings are cute too ;)
ReplyDeletefollowing you from Dixie Diva Deals, please visit me when you have a second. I LOVE your site and I am sharing this idea with a link to your site under my party resource guide!
ReplyDeletewww.dixiedivadeals.com
Thanks so much for linking up with Terrifying Tuesday at Cheapskate 4 Life! I am your newest follower and hope you'll come back again next week to join the Tuesday blog hop! Love the bat wings idea :)
ReplyDeleteThanks for all of the sweet comments you guys! I'm so glad you liked the craft! Let me know of any easy costumes you think of!
ReplyDeleteToo Cute! Excellent way to make them too!
ReplyDeleteYou should come link this up to my Making It With Allie link party!
AllieMakes.Blogspot.com
That is so fun for Halloween! Love it!
ReplyDelete